dev notes
software development craftsmanship
2017-01-02
get in touch with react
Last year I started a little web project for work. After probing some frameworks, I started with react. I must say, the tooling around the framework is quite sophisticated.
First of all, npm is needed for the build tool chain.
Via npm install create-react-app -g you've got a good point to start.
It installs the tool chain, needed for creating a development environment.
Let us take a simple Blog engine as an example.
You can setup a new react project with create-react-app Blog.
This command creates a new folder named Blog and installs a bunch of tools in the project directory.
With npm start you can take a first look of the generated result.
It should look like
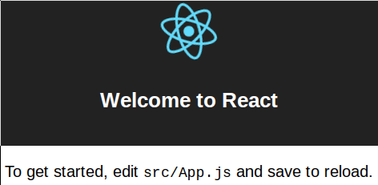
Compiled successfully!

The app is running at:

  http://localhost:3000/

Note that the development build is not optimized.
To create a production build, use npm run build.
The development server is up and running.
At every time you can make a production build with npm run build.
The first build size is with 152kb rather small.
After deleting some unused files you have left an index.html as a starting point for our application.
<!doctype html>
<html lang="en">
  <head>
    <meta charset="utf-8">
    <meta name="viewport" content="width=device-width, initial-scale=1">
    <link rel="shortcut icon" href="%PUBLIC_URL%/favicon.ico">
    <title>React App</title>
  </head>
  <body>
    <div id="root"></div>
 </body>
</html>
The corresponding index.js looks like
import React from 'react';
import ReactDOM from 'react-dom';
import App from './App';

ReactDOM.render(
  <App />,
  document.getElementById('root')
);
and the App.js like
import React, { Component } from 'react';

class App extends Component {
  render() {
    return (
      <div className="App">
        Test
      </div>
    );
  }
}

export default App;
The existence of index.html and index.js is mandatory for the build process.
Everything else can be changed.
If you are wondering about the weird syntax in the render methods, let me assure you, everything is all right. This is called JSX and it is a JavaScript syntax extension. If you like to see, what is JSX in depth, there are some good examples as part of the documentation.
If you are new to ECMAScript >6, look at the new features. React uses a lot of them, especially classes, expression bodies and block scoped variables.
We don't want to code our own CSS framework for our blog engine. There are several possibilities available on the market. Google's material design is available for a while. It exists a project, which combines react components with the material design. It is called material ui.
We are going to use a few components for our blog application.
For a working app, material ui requires a theme.
Therefore the index.js must be adjusted.
import React from 'react';
import ReactDOM from 'react-dom';
import MuiThemeProvider from 'material-ui/styles/MuiThemeProvider';

import App from './App';

ReactDOM.render(
  <MuiThemeProvider>
    <App />
  </MuiThemeProvider>,
  document.getElementById('root')
);
Now we can use the material ui components.
But first, we need some data. For scaffolding, we can use simple json files. Later on, they can be replaced by an api.
{
    "data": [{
        "Id": 1,
        "Title": "Test 1 MainTitle",
        "SubTitle": "Test 1 Subtitle",
        "Text": "Lorem ipsum dolor sit amet, consetetur sadipscing elitr, sed diam nonumy eirmod tempor invidunt ut labore et dolore magna aliquyam erat, sed diam voluptua. At vero eos et accusam et justo duo dolores et ea rebum. Stet clita kasd gubergren, no sea takimata sanctus est Lorem ipsum dolor sit amet. Lorem ipsum dolor sit amet, consetetur sadipscing elitr, sed diam nonumy eirmod tempor invidunt ut labore et dolore magna aliquyam erat, sed diam voluptua. At vero eos et accusam et justo duo dolores et ea rebum. Stet clita kasd gubergren, no sea takimata sanctus est Lorem ipsum dolor sit amet."
    },{
        "Id": 2,
        "Title": "Test 2 MainTitle",
        "SubTitle": "Test 2 Subtitle",
        "Text": "Lorem ipsum dolor sit amet, consetetur sadipscing elitr, sed diam nonumy eirmod tempor invidunt ut labore et dolore magna aliquyam erat, sed diam voluptua. At vero eos et accusam et justo duo dolores et ea rebum. Stet clita kasd gubergren, no sea takimata sanctus est Lorem ipsum dolor sit amet. Lorem ipsum dolor sit amet, consetetur sadipscing elitr, sed diam nonumy eirmod tempor invidunt ut labore et dolore magna aliquyam erat, sed diam voluptua. At vero eos et accusam et justo duo dolores et ea rebum. Stet clita kasd gubergren, no sea takimata sanctus est Lorem ipsum dolor sit amet."
    },{
        "Id": 3,
        "Title": "Test 3 MainTitle",
        "SubTitle": "Test 3 Subtitle",
        "Text": "Lorem ipsum dolor sit amet, consetetur sadipscing elitr, sed diam nonumy eirmod tempor invidunt ut labore et dolore magna aliquyam erat, sed diam voluptua. At vero eos et accusam et justo duo dolores et ea rebum. Stet clita kasd gubergren, no sea takimata sanctus est Lorem ipsum dolor sit amet. Lorem ipsum dolor sit amet, consetetur sadipscing elitr, sed diam nonumy eirmod tempor invidunt ut labore et dolore magna aliquyam erat, sed diam voluptua. At vero eos et accusam et justo duo dolores et ea rebum. Stet clita kasd gubergren, no sea takimata sanctus est Lorem ipsum dolor sit amet."
    },{
        "Id": 4,
        "Title": "Test 4 MainTitle",
        "SubTitle": "Test 4 Subtitle",
        "Text": "Lorem ipsum dolor sit amet, consetetur sadipscing elitr, sed diam nonumy eirmod tempor invidunt ut labore et dolore magna aliquyam erat, sed diam voluptua. At vero eos et accusam et justo duo dolores et ea rebum. Stet clita kasd gubergren, no sea takimata sanctus est Lorem ipsum dolor sit amet. Lorem ipsum dolor sit amet, consetetur sadipscing elitr, sed diam nonumy eirmod tempor invidunt ut labore et dolore magna aliquyam erat, sed diam voluptua. At vero eos et accusam et justo duo dolores et ea rebum. Stet clita kasd gubergren, no sea takimata sanctus est Lorem ipsum dolor sit amet."
    }]
}
A blog entry can be viewed with a card.
Every component is either statefull or pure. A statefull component can change after render. A pure component depends only on it's properties. These properties are filled on creation, so pure components are kind of immutable.
As you design your application you must decide which component should hold the state.
For this example I made a pure component BlogPost
import React, {
Component
} from 'react';
import {
Card,
CardHeader,
CardText
} from 'material-ui/Card';
class BlogPost extends Component {
render() {
return <Card expanded={true} style={{ marginBottom : '10px' }}>
<CardHeader
title={this.props.title}
subtitle={this.props.subTitle}
/>
<CardText>
{this.props.text}
</CardText>
</Card>
}
}
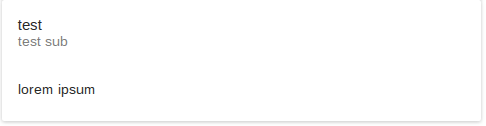
export default BlogPost;This component will only render property data.
<BlogPost title="test" subTitle="test sub" text="lorem ipsum" />will be rendered to
How do we get our json blog data into our application.
For our small example, we extend our App.js to a statefull component.
The data will be loaded after application start.
A good place for this is the componentDidMount function. Changes on state will cause a rerender of the affected dom elements. We will override this method with.
componentDidMount(){
  fetch('./blogPosts.json')
    .then((response) => {
      return response.json();
    })
    .then((response) => {
      this.setState({ blogPosts : response.data});
    })
}
After the fetch the state will have an array state.blogPosts, which contains all the blog data.
For the first posts, this solution will be good enough, but this part is a good candidate for later refactor.
To ensure the state.blogPosts Array exists, it should be initialized in the constructor.
constructor(props){
  super(props);
  this.state = {
      blogPosts : []
  };
}
To render the json data, we must rewrite the render method of our App.js to use the state data.
render() {
  const posts = this.state.blogPosts.map((post) => {
      return <BlogPost
          key={post.Id}
          title={post.Title}
          subTitle={post.SubTitle}
          text={post.Text} />
  });

  return <div className="App">
            { posts }
         </div>
}
The state.blogPosts must be mapped to react components.
Due to the JSX extensions, the BlogPost Component can be returned by a simple function.
The key property is necessary for react, to identify the dom element, to be rendered on change.
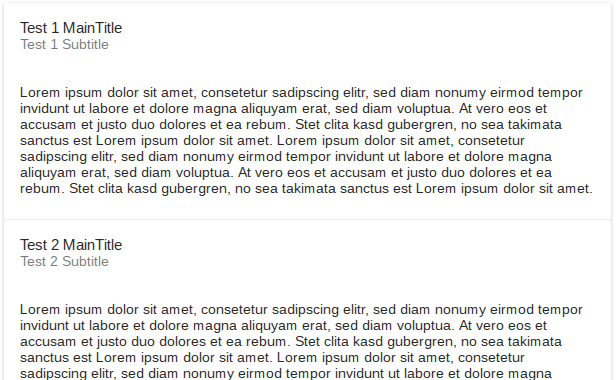
After fetching the data the App.js will look like
Our v1 can display blog data coming from a server (json file). For a skateboard this is ok for now. You can review the source on Github